Showing posts with label *****. Show all posts

Saturday, April 22, 2023

Favourite Mac n Cheese

 photo pending

My updated and preferred method of making what is probably my favourite dish.

  • 1 C small-shape dry pasta
  • 1 Tbsp butter
  • 1 Tbsp flour
  • 1/8 tsp salt
  • dash cayenne pepper
  • 2/3 C milk
  • 1 C shredded sharp Cheddar cheese
  • 1/3 C panko bread crumbs
  • 1/4 C shredded Mexican cheese blend

1.  Preheat oven to 350°F.  Boil pasta according to package directions until just cooked or slightly al dente.  Do not overcook the pasta. 
2.  While the pasta is cooking, in a medium, heavy, oven-safe pan over medium-high heat, melt butter, using a whisk to move it around so that the melted butter covers the bottom and inner sides of the pan.  Once the butter is completely melted and starting to bubble, but before it begins to brown, add flour, salt, and cayenne.  Whisk to combine, and do not allow the flour to burn.  Add milk, a Tablespoon or so at a time, whisking constantly but not fast.  Be sure that the flour-butter mixture is being fully mixed into the milk with each addition.  It may not be necessary to use all of the milk, stop when the sauce is a little thinner than preferred consistency, as the cheese will thicken the sauce.
3.  Drain cooked pasta and leave in colander until needed. 
4.  Add sharp Cheddar cheese to sauce in small amounts, whisking through to fully melt cheese and mix it into sauce.  Once cheese sauce is complete, add drained pasta in small amounts and stir through.  Flatten pasta in sauce within the pan, filling the pan and creating an even top.
5.  Toss panko and Mexican cheese together, and spread over top of pasta in sauce. 
6.  Bake, at 350°F, for 20 minutes or until golden and crispy on top.  Remove from oven, run a spatula around the edge, and allow to cool for 2 minutes before serving.

Robyn's notes: this is a go-to recipe for me now, and typing it here is the first time I've actually written it up, I just do it from memory when I make it.  I have been known to add cooked crumbled bacon, and when I do so I will often replace a bit of the butter with bacon grease (not a lot, though, or the sauce will struggle to come together).  You can't specifically taste the cayenne with just a dash, it simply provides some depth of flavour, but I have a couple of times been overly generous with the dash and it's been noticeable then!  So if you like a bit of kick, feel free to go a little heavy on it.  Change up the cheese if desired--I've used Kerrygold Dubliner a few times--or add a favourite seasoning to the topping, whatever feels right.  The pan I use is an enameled cast iron 8 inch round skillet, happens to be made by Crock Pot (not sponsored).  I own two identical pans, in the teal that is my favourite colour, and they are holding up.  Watch me demonstrate this recipe on YouTube!

 ***** 5 Stars: Excellent. A favourite for both of us, I will make this repeatedly

Monday, October 30, 2017

Instant Pot Hard-Cooked Eggs

I'm not breaking any new ground with this one, but having it here will help me remember the adjustments I made for yield and elevation.
  • 1/2 C water
  • 6 large eggs
1.  Pour water into the inner pot of Instant Pot.  Insert steam rack, handles up, into the pot.  Carefully set eggs, in a single layer, on the rack, and place the inner pot into the cooker.
2.  Close and lock lid of Instant Pot.  Turn the steam release handle to "sealing" position.  Press "Manual" and cook at High Pressure 9 minutes.
3.  While eggs cook, fill a large bowl with cold water.  When time is up, immediately open the cooker using Quick Pressure Release.  Transfer eggs to cold water to stop the cooking process.  Cool completely and store in refrigerator.

Robyn's notes: this is the only way I make hard-cooked eggs anymore, and I've been making tons of them since I started doing it this way.  It's quick, I don't have to stand watching for the water to boil, and they cook exactly the way I want them to.  I've also found that they've been peeling more easily than hard-boiled eggs, but that could be more a function of the eggs themselves than the cooking process.  I fill the bowl with water and place it in the fridge while the eggs are cooking, so I don't have to bother with ice, taking it out just before the time is up.  Remember that 9 minutes is the cooktime for my altitude, sea level will be lower (though not by much).  Experiment to find your perfect time.

For my IP Mini, it's 3/4 C water and 7 minutes.

***** 5 Stars: Excellent. A favourite for both of us, I will make this repeatedly

Tuesday, October 10, 2017

Allergy-Free Powdered Sugar

Corn-free powdered sugar, used just like store-bought, no need to adjust your recipes to use it!
  • 1 C sugar
  • 1 Tbsp tapioca starch
1.  Combine sugar and starch in a blender or spice grinder.  Process for 1-2 minutes, until consistency of light powdered sugar.  Store in an airtight container or zip-top bag.

Robyn's notes: this is very easy and quick.  If using a spice grinder or coffee grinder, it'll have to be done in batches, but in the blender it can all be done at once.  Watch me demonstrate this recipe on youtube!

***** 5 Stars: Excellent. A favourite for both of us, I will make this repeatedly

Wednesday, February 1, 2017

Pomegranate-Honey Cornish Game Hens

If you're looking for a special occasion dinner for two (maybe for Valentine's Day?), look no further.  With a roast bird for each of you, this is delicious and filling, with a fancy presentation.  And while it does take some time, it's actually very simple to accomplish.
  • 1/4 C sugar
  • 3/4 C kosher salt
  • 1 gallon water (see notes)
  • 2 Cornish game hens (giblets removed if necessary)
  • 1 C honey
  • 2 Tbsp pomegranate juice
  • pomegranate seeds (optional)
1.  In a large zip-top or brining bag, combine sugar, salt, and water.  Stir or agitate to help sugar and salt dissolve.  Add hens, ensuring they are completely covered.  Seal and refrigerate for 2 hours.
2.  Preheat oven to 400°F.  Remove hens from bag and discard brine.  Completely rinse hens, including cavity, in cool water, and pat dry. 
3.  Stir honey and juice together until well combined (see notes).
4.  Tie the legs of each hen together with kitchen twine.  Glaze both sides of hens with approximately 2 Tbsp honey mixture per bird.  Place hens breast side down on an elevated rack in a roasting pan.  Roast at 400°F for 1 hour, re-glazing birds with more honey mixture every 15 minutes and rotating the pan each time.  After the first 30 minutes, flip hens over in the pan. 
5.  After a total of 1 hour of cooking, or when meat thermometer reads 160-165°F, remove birds from pan and allow to rest.  Meanwhile, in a small saucepan, reduce any remaining honey mixture over medium heat for 3-5 minutes. 
6.  Pour reduced sauce over hens and sprinkle with pomegranate seeds if desired. 

Robyn's notes: brining can be skipped if desired, but will help keep roasted birds juicy.  The brining liquid can be all water, all chicken or vegetable broth, or a combination, as long as it totals 1 gallon.  Birds start breast side down so that the juices will move down into the breast and help to keep it from drying out as the darker meat cooks.  Even though the birds cook for 1 hour, it takes a few minutes to do each of the three glazes, rotate the pan, and flip the hens.  With that and resting time, plan to serve about 90 minutes after the birds first go into the oven.  I seeded a pomegranate and used fresh juice, but store-bought juice can be substituted.  The amount of juice added to the honey is by taste.  Start with 2 Tbsp, and if the pomegranate flavour isn't strong enough, add more.  I used a strong local honey that required quite a bit more juice to balance the flavour.  After the sauce is reduced, it will harden very quickly if left in the pan or in a bowl, so pour it over the birds right away and set everything to soak while you enjoy dinner.  Watch me demonstrate this recipe on youtube!

***** 5 Stars: Excellent. A favourite for both of us, I will make this repeatedly

Wednesday, November 30, 2016

Enchiladas

A very special family recipe!  My late maternal grandpa was in the US Army Air Forces (the predecessor to the US Air Force) during WWII, and the wife of one of his friends in the USAAF had the original recipe.  When she made it, it was meatless, but my grandmother added ground beef, and we've been making it ever since.  I'm so spoiled by these enchiladas--and especially by the sauce--that I don't ever order enchiladas in restaurants, because I know they just won't be as good as the ones I grew up on! 

Sauce

  • 3 Tbsp flour
  • 1/2 tsp garlic salt
  • 3 Tbsp vegetable oil
  • 2 Tbsp Gebhart's Eagle Brand* chili powder
  • 1 1/2 C water
1.  Combine flour and garlic salt in a small bowl, set aside.  
2.  In a medium saucepan, heat oil over high heat; stir in flour mixture.  Reduce heat to medium or medium-high and cook for 1 minute.  Do not allow flour to brown. 
3.  Remove pan from heat and stir in chili powder; when thoroughly blended, return to heat and immediately stir in water.  Stir until it is a smooth consistency--do not allow chili powder to burn. 
4.  Simmer, stirring occasionally, for 15 minutes. 

Enchiladas

  • 1/4 lb ground beef
  • 3 green onions, diced
  • 2 1/2 C shredded Monterey Jack cheese
  • 4 corn tortillas
1.  While sauce simmers, brown ground beef.  Add salt and pepper to taste if preferred.  Preheat oven to 350°F.
2.  Drain fat from meat and allow to cool.  Add onions and two-thirds of cheese and stir thoroughly. 
3.  Warm tortillas (see notes, below).  Divide the meat mixture evenly between the tortillas and roll each one.  Place rolled enchiladas, seam side down, in ungreased baking dish.  Pour sauce over all, and top with remaining cheese.
4.  Bake enchiladas 10-15 minutes at 350°F or until sauce bubbles and cheese melts.  Serve hot. 

Robyn's notes: to warm tortillas, place them between dampened paper towels, then microwave on high for 1 minute.  If a microwave is not available, remove from package and place in a brown paper back.  Sprinkle the outside of bag with water and place in preheated oven for 5 minutes.  Chili powder brand is important in this case.  The enchiladas can be made with another brand, but they really won't taste as good.  Each family member has tried, friends have tried, it's just not worth the substitution.  Gebhardt's is not always available (I can't get it at the markets in my area), but it can be ordered online in reasonably-sized packages, and is usually found at larger stores.  The sauce will make more than needed for four enchiladas, but can't really be reduced any further.  The leftovers are great drizzled over scrambled eggs, or baked chicken.  Watch me demonstrate this recipe, with a special guest, on youtube!

***** 5 Stars: Excellent. A favourite for both of us, I will make this repeatedly

Monday, September 5, 2016

Chocolate Cherry Bars


In 1974, Mrs Emil Jerzak won a grand prize from Pillsbury for her Chocolate Cherry Bars recipe, and my family has been making them ever since.  The original recipe called for a box of fudge cake mix, and over the years all brands have changed their formulation in various ways.  The finished product remained delicious, but wasn't exactly what it was 42 years ago.  My mom and I have both separately worked on tweaks to the full-size version, to regain the remembered taste and texture, and I have long wanted a reduced version.  This is my final successful incarnation, sized for my smaller household.  It does call for half a can of cherry pie filling, but the remainder can be covered and refrigerated for up to 2 weeks and used for another purpose...perhaps Slow-Cooker Cherry-Balsamic Pork Tenderloin?  Each mini loaf is two servings, so this recipe makes a total of four servings, but I suspect the second loaf won't stand around long before being eaten.
  • 1 batch Instant Fudge Cake Mix
  • 1 C cherry pie filling (from a 21 oz can)
  • 1/2 tsp almond extract
  • 1 egg, beaten

Frosting

  • 1/2 C sugar
  • 2 1/2 Tbsp butter
  • 3 Tbsp milk
  • 1/2 C semi-sweet chocolate chips
 1.  Preheat oven to 350°F.  With shortening, grease and then flour two mini loaf pans (5.75"x 3"x 2").  In medium bowl, combine first four ingredients, stir by hand until well mixed.  Pour into prepared pans.
2.  Bake at 350°F for 25 to 30 minutes, or until toothpick inserted in center comes out clean.
3.  While bars cool, prepare frosting.  In small saucepan, combine sugar, butter, and milk.  Boil, stirring constantly, 1 minute.  Remove from heat, stir in chocolate chips until smooth.  Pour over partially cooled bars.

Robyn's notes: though it's perfectly fine to use flour to prepare the pans, I like to use cocoa powder instead.  Flour can sometimes leave a bit of white on the finished cake, while cocoa will blend with the dark brown of the chocolate and won't be visible.  The original bars were intended to be frosted while still in the pans, so that only the tops were frosted, but I like to remove them from the pans first, so the frosting drips down the sides of the cakes.  The frosting will set very quickly, so however you choose to do it, do it fast. 

***** 5 Stars: Excellent. A favourite for both of us, I will make this repeatedly

Monday, June 27, 2016

Salmon with Asparagus and Herb Vinaigrette


I actually made this for my sweetheart's birthday 3 years ago, while on my hiatus from this site.  It went far more quickly than I expected. 
  • 2 (6-ounce) center-cut salmon fillets, about 1 1/2 inches thick
  • salt and pepper
  • 1/4 C olive oil, divided
  • 1 Tbsp butter
  • 1 pound thick asparagus, tough ends trimmed
  • 1 small shallot, minced
  • 4 tsp fresh lemon juice
  • 2 tsp minced fresh parsley, basil, or mint leaves
  • 1/2 tsp Dijon mustard
1.  Pat salmon dry with paper towels and season with salt and pepper.  Heat 2 Tbsp oil in 10-inch nonstick skillet over medium-high heat until just smoking.  Carefully lay salmon in skillet, skin side up, and cook until well browned on first side, about 5 minutes. 
2.  Flip salmon over, reduce heat to medium, and continue to cook until center of thickest part of fillets is still translucent when cut into with paring knife and instant-read thermometer inserted in thickest part registers 125°, about 3 minutes longer.  Transfer salmon to platter, tent loosely with foil, and let rest while cooking asparagus. 
3.  Wipe out skillet with paper towels, add butter and 1 tsp more oil, and heat over medium heat until butter has melted.  Add half of asparagus to skillet with tips pointed in one direction and add remaining spears with tips pointed in opposite direction.  Sprinkle with 1/8 tsp salt and gently shake asparagus into even layer. 
4.  Cover and cook until spears are bright green and still crisp, about 5 minutes.  Uncover, increase heat to high, and continue to cook until spears are tender and well browned on one side, 5 to 7 minutes, using tongs to move spears from center of pan to edge of pan to ensure all are browned.
5.  Meanwhile, whisk remaining 3 Tbsp oil, shallot, lemon juice, parsley, and mustard together in small bowl and season with salt and pepper to taste.  Transfer asparagus to platter with salmon, drizzle with vinaigrette, and serve. 

Robyn's notes: this is probably his favourite meal I've ever cooked for him.  The whole time he was eating it he raved about how good it was.  I can't eat salmon, so I took his word for it.  

***** 5 Stars: Excellent. A favourite for both of us, I will make this repeatedly

Thursday, June 9, 2016

Old-Fashioned Baking Powder Biscuits


My favourite biscuits of all time, my mom has been making these as long as I can remember.  When I struck out on my own for the first time she made me a recipe binder with some well-loved dishes, several of which she reduced to serve fewer people.  The original recipe made 8-9 biscuits, my mom did the work of cutting it down to this form.
  • 1 C flour
  • 1 1/2 tsp baking powder
  • 1/4 tsp salt
  • 1/4 C shortening
  • 1/3 - 1/2 C milk
1.  Preheat oven to 450°F.
2.  In a medium bowl, combine flour, baking powder, and salt.
3.  Using a fork or two table knives, or a pastry blender, cut shortening into flour mix until consistency of coarse meal.
4.  Add milk beginning with smaller amount; stir with fork until mixture leaves sides of bowl and forms a soft, moist dough, adding additional milk one Tablespoon at a time, if necessary to achieve desired consistency.
5.  On floured surface, toss lightly until no longer sticky.  Roll out to 1/2 to 1 inch thick; cut with 2 inch floured cutter or cut into squares with serrated knife or dough blade.
6.  Place on ungreased baking sheet.  Bake at 450°F for 8 to 12 minutes or until light golden brown.  Serve hot.  Yield: 4 biscuits

Robyn's notes: to make these into buttermilk biscuits, add 1/8 tsp baking soda to flour mix and substitute buttermilk for milk.  For cheese biscuits, add 2oz shredded Cheddar cheese to flour-shortening mixture.  Bake on greased baking sheet.  These are a big hit around here, and we will both eat basically as many as are available, so it's good to limit it to making fewer.  You can watch me prepare these biscuits on youtube!  

***** 5 Stars: Excellent. A favourite for both of us, I will make this repeatedly
 

Friday, November 2, 2012

Fudge-Ana

When I was young, I had a lot of activities, from piano to Camp Fire to various things involving horses. For a lot of years one of those activities was ballet, and I was really into it. Throughout my ballet years, a tradition existed in my hometown of going to the small downtown ice cream parlor after performances and treating the performers to a sundae.  Back then, I had a hard time choosing a favourite sundae, but as I've gotten older and the family has continued to make the occasional visit there, I've settled on the Fudge-Ana.  It's not flashy, like the Cherry Hawaiian (coconut pineapple and burgundy cherry ice creams topped with pineapple and creamy marshmallow, chopped toasted nuts, whipped cream, and a cherry).  It doesn't have a pop of flavour like the Mint Delight (chocolate mint and peppermint stick ice creams topped with hot fudge and creamy marshmallow, chopped toasted nuts, whipped cream, and a cherry).  And it isn't surprising, like the Honeycomb Buzz (I'll let you wonder).  What it is, is delicious, every time.  It's just that little bit more than a hot fudge sundae, and every time I eat one, I'm transported right back to that pink and white shop, sitting in a chair with a heart-shaped back while I kick my ballet shoes under the table and spin the free glass of ice cold water they give you as soon as you walk in the door. 
  • hot fudge ice cream topping
  • one medium banana, sliced into coins
  • vanilla ice cream
1.  Melt hot fudge as instructed on package.  Drop a spoonful into bottom of sundae glass or tall drinking glass.   Top with three or four banana coins.  Add one small scoop of ice cream.  Repeat in layers until glass is full.  If desired, top with whipped cream, nuts, and a cherry.

Robyn's notes: no measurements, because it's really about how much you feel like eating, how large the serving vessel is, and how much you like hot fudge. I don't generally bother with the whipped cream, nuts, and cherry when I'm making a Fudge-Ana at home, because it means having them sitting around waiting to be used up.

 ***** 5 Stars: Excellent. A favourite for both of us, I will make this repeatedly

Sunday, July 1, 2012

Cookbook Review: Essentials of Cooking


Author: James Peterson
Published: 1999 by Artisan, my copy--with the cover shown above--published 2003
Available for Purchase: Amazon, Powell's, Barnes and Noble

This is a departure from the cookbooks I usually purchase, as it's not a specifically "cooking for two" or small-yield book, and it's not really even a cookbook.  Truly, it's a cooking reference book, and if you've only got space for one on your shelf, this should be one of the top contenders for that spot. 

This really does offer the "essentials", plus several new ideas that would never have occurred to me.  The book starts with full instructions--including step by step photos--on peeling vegetables (each type of vegetable is demonstrated separately), and ends with preparing and braising a large rabbit.  In between is everything from making tomato sauce to making chicken liver mousse; making french fries to cooking squid; poaching eggs to boning a whole round fish.  And there are clear photographs for each and every bit.  Even the 25 page glossary has some pictures, and it provides more than just definitions for each term.  The entry for "steam", for example, defines what cooking in steam is, how to do it, when it is usually done (with cross-reference to earlier text), descriptions of the four main types of steamers available for purchase, a description of how to improvise your own steamer, and instructions for how to use two different types of steamers.

I've never had to fillet a salmon, because my sweetheart takes care of that aspect for me when he catches the fish.  But I truly believe that if I were faced with a whole salmon, I could use the 19 photos here to take me from cutting away the fins to removing the pin bones.  At the same time, there are instructions--I hesitate to call them recipes, as most give ratios, not measurements--for all sorts of dishes, and I could use this book to make mayonnaise, chunky vegetable soup, baked tomatoes with garlic and fresh basil, gnocchi, or any of 18 classic sauces for sauteed chicken. 

Complete and sensible index, well-arranged table of contents, and colour-coded page numbers correlating to sections make it easy to find what's needed quickly.  There was not a single technique that left me feeling a jump had been made from one step to the next, and anything that requires previous knowledge tells you which page to find that particular bit of knowledge on.  For example, on "How to poach chicken in a pot", there are references to "to truss a chicken, page 146", "to core and section carrots, page 21", "to make a bouquet garni, page 31", and "to carve a roast chicken, page 149", plus the related glossary entry (poach) is listed so the reader knows where to go for more.

I am completely unsurprised that this guide was nominated for a James Beard award.  It is a condensing of years of training for those of us who will never attend culinary school but want a solid foundation for our home cooking.  As it says on the inner jacket: "Knowing how to execute a technique makes you efficient; knowing why you've chosen that technique makes you a master."

Friday, June 22, 2012

Hamburger Stroganoff

This may not be the prettiest meal I'll ever post, but it is another nostalgic comfort food dish for me.  I've reduced it heavily from the recipe my mom made when I was a kid.  When I first moved out, I was also moving out of state, far enough that visits would be 1-2 times per year.  One of the things my mom sent with me was a binder of recipes that I'd loved growing up.  This was in there, and that's where I've taken it from.  I don't have any idea where she originally got the recipe.  Don't forget to prepare the potatoes, however you prefer to bake them (I actually use the microwave when they're being served under a dish like this).
  • 2 strips of bacon, diced
  • 1/2 lb ground beef
  • 1/4 C chopped onion
  • 1 Tbsp flour
  • 1/3 tsp salt
  • 1/8 tsp paprika
  • pinch pepper
  • 2/3 C condensed cream of mushroom soup (from a 10.75 oz can)
  • 1/2 C sour cream
1.   Place ground beef and bacon in skillet; cook and stir until beef is browned.  Add onion and cook until just tender.  Spoon off excess fat.
2.  Blend flour and seasonings into meat; stir in soup.  Reduce heat and simmer, uncovered, for 10-15 minutes, stirring often.
3.  Stir in sour cream.
4.  Serve over baked potatoes.

Robyn's notes: this is a very filling meal, in my opinion.  You will be using half of the can of condensed cream of mushroom soup, see "Using Up Ingredients" at the top of the page for suggestions on what to do with the rest of the can.  The recipe says this can also be served over egg noodles or toasted hamburger buns, but I like it best over baked potatoes, so that's all I'm listing in the recipe itself.  It was hard to find a good skillet size for this, I used a 10-inch, which was perfect for browning the beef, bacon, and onion, but once it got to the simmering it seemed a bit large.  Be sure to scrape the bottom of the pan when stirring.  I let the skillet sit over low heat for about 2 minutes after stirring in the sour cream, just to let it thicken up a bit before spooning it over the potatoes.  Probably only a 4 star recipe, but the nostalgia factor gives it a fifth star.  

 ***** 5 Stars: Excellent. A favourite for both of us, I will make this repeatedly

Monday, June 18, 2012

Hungarian Goulash

This is a very reduced version of a recipe my mom made for us a lot when I was growing up.  I don't know how much similarity it bears to actual Hungarian dishes, I've done a lot of travelling but Hungary is not one of the places I've visited.  It is, for me, a touch of childhood and the smell of it cooking means comfort.  Plan ahead, this recipe has a long cook time.
  • 1/2 lb boneless beef chuck, cut into 1-inch cubes
  • 1 Tbsp flour
  • 1 Tbsp oil
  • 3/4 C sliced onions
  • 3/4 tsp paprika
  • 1/4 tsp salt
  • pinch pepper
  • 1/3 C condensed beef broth from a 10.5oz can
  • 4 oz egg noodles
  • 1/3 Tbsp butter (optional)
  • 3/4 tsp poppy seeds (optional)
  • 1/4 C sour cream
1.  In medium bowl, toss meat cubes with flour to coat.  In Dutch oven or 10-inch skillet, brown meat cubes in oil until well browned on all sides.  Add onions, paprika, salt, pepper, and beef broth.  Cover and cook over low heat for 1-1/2 hours or until meat cubes are tender.
2. Shortly before serving, cook noodles as instructed on package.  Drain.  If desired, toss with butter and poppy seeds.
3.  Add sour cream to meat mixture and cook over low heat until heated through, stirring constantly.  Serve over noodles.

Robyn's notes: It may seem like 1 Tbsp of flour isn't enough to coat 1/2 lb of meat, but it really turns out to be enough.  I also tap off as much excess flour as possible before putting it in the pan, so it doesn't get gloppy.  I used a ten-inch skillet.  When browning the meat it was the perfect size to accommodate all the cubes with space to turn them once, and when it came time to cover and cook I pushed all the ingredients to one side of the pan together.  I checked the status of the meat several times during the 90 minutes of cooking, stirring things around and making sure there was still enough liquid, as my mom had warned me I might need to add more broth.  She generally uses her electric skillet to make this for 4 people, and in the electric skillet she adds more broth.  I didn't need to add another drop.  I can't eat seeds, they cause a lot of pain for me, so I just leave the poppy seeds out entirely, I don't think it changes the taste or enjoyment at all.  Probably more a 4 star dish if it didn't have such nostalgic feeling for me.  As it is, I won't make it often, but will make it for many years to come, 5 stars.  


***** 5 Stars: Excellent. A favourite for both of us, I will make this repeatedly

Saturday, June 9, 2012

Reversed Chicken Cordon Bleu

I know I just wrote a recipe for a non-traditional Chicken Cordon Bleu 6 weeks ago, but here's how this new one happened...

I was up late one night recently, sick, with a fever that made it difficult to get comfortable in bed, and so out on the sofa.  I flipped through channels until I gave up and settled on an episode of Iron Chef America (a show I'd never watched because I hadn't really enjoyed the episodes of the original Iron Chef that I'd tried).  At one point a chef put a plate under the salamander, and as the host wondered aloud what was on it, the chef replied that it was a provolone sauce.  I thought to myself "how great would that be, a cheese sauce on the plate, under the food, broiled a bit to get it hot and brown and rich and gooey and delicious".  Since I (once again) had some Gruyere in the house needing to be used, I decided to write a recipe with a Gruyere sauce as the base.  I immediately ran into a major problem, namely that of not wanting to shatter my dinnerware.  Obviously I don't have a salamander (lizard or professional kitchen equipment), but I'd assumed I'd use the broiler.  The two kinds of dinner plates I have are newer Fiestaware and unknown-age Corningware.  Some vintage Fiestaware can go under the broiler, the new stuff can't (shouldn't.  People risk it and sometimes win, sometimes lose.  The company says "don't").  Same with Corningware.  My Corningware is possibly old enough (I got it from a relative who was 79 when she died 12 years ago, and I suspect she'd had it for decades), and it doesn't say "not for stovetop or broiler use" on the back like some Corningware does, but why risk it, especially when it would mean a recipe that few people could safely duplicate?  So I've switched my beautiful idea to a dipping sauce, which ended up not needing to be broiled (see notes below), but I still think how great it would have been to serve a deep blue plate with a bubbly brown-edged white Gruyere sauce pooled in the center and a couple skewers of wrapped chicken slanted across it.

Chicken
  • 2 boneless, skinless chicken breast halves
  • 4 thin slices prosciutto
  • 1/2 Tbsp (approximate) Dijon mustard
1. Preheat broiler.  Cut chicken into 1-inch cubes.  Slice each piece of prosciutto lengthwise into 1/2-inch thin strips, then slice each strip into 3-inch lengths.  Using the back of a spoon, gently spread Dijon mustard thinly onto one side of each strip of prosciutto.  Wrap each piece of chicken with a strip of prosciutto, and secure on skewers (about 5-6 wrapped chicken pieces should fit onto each 10-11inch skewer).  Broil, 4-6 inches from heat, 3-4 minutes per side.
2.  While chicken is broiling, make Gruyere sauce.

Gruyere Sauce
  • 2 tsp butter
  • 2 tsp flour
  • 1/2 C milk
  • 1/4 C grated Gruyere cheese
  • dash pepper
1.  In a small saucepan, melt butter over medium-low heat.  Add flour and stir until combined, do not allow to brown.  Gradually whisk in the milk.  Increase heat to high and bring to a boil, stirring constantly.  Reduce heat and simmer until sauce has thickened.
2.  Remove from heat.  Add cheese, stir until melted, season with pepper.  Pour sauce into mini cocotte or ramekin for serving.

When chicken has finished cooking, remove from skewers and serve with rice, sharing the Gruyere sauce between both people to use as a dipping sauce.

Robyn's notes: Normally if I were writing a basic cheese sauce like the one above, it would include salt for seasoning.  But since this sauce is being used alongside a dish with prosciutto in it, I've left the salt out.  Prosciutto brings enough of a salt flavour to a dish without adding additional sodium to the sauce.  Prosciutto can be difficult to slice, and I recommend taking the package out of the fridge at least 10 minutes before starting to cook.  Try to carefully lay a single slice on your cutting board and cut with the end of a sharp knife without moving the meat.  It has a tendency to stick to itself and its packaging and to shred, if it does simply try to make it work by wrapping what you can around the chicken.  If using wooden skewers, soak them in water for at least 20 minutes before putting the chicken on.  This helps the food slide on and off better, reduces the chance of slivers of wood breaking off with the movement of the food, and in some cases can help keep the skewers from burning all the way through.  They are still likely to char at the ends.  I did broil the Gruyere sauce alongside the chicken for the last 2 minutes of cook time, but it didn't brown on top and just gave the sauce a bit of a skin, so don't bother.  The sauce will be nice and hot from having just been made, and the broiling wouldn't add anything to it.  I made half of the chicken with Dijon mustard in the wrapping and half without, because I don't actually like the taste of Dijon, despite cooking with it pretty often, and I wasn't sure which would be better.  The pieces without were good, but the pieces with the Dijon had a wonderful depth of flavour that made a big difference, so I'm definitely including it in the recipe.  It doesn't actually taste like Dijon, just adds a little needed something to the dish.  Unless every bite of chicken is absolutely covered with dipping sauce, there will be some Gruyere sauce left over.  I simply couldn't write the recipe any smaller or it would be nearly impossible to make the roux.  So if there's enough left to save in a covered container in the fridge, it can be served over vegetables (especially cauliflower or broccoli) the following day.  We were both really pleased with this dish, and while prosciutto is too expensive to buy regularly, it'll definitely go on the list of favourites for an occasional splurge.  
 
***** 5 Stars: Excellent. A favourite for both of us, I will make this repeatedly

Monday, June 4, 2012

Vanilla Sugar

I am a big fan of vanilla.  The only scented body or hand soap I'll use willingly is vanilla, the only kind of scent or perfume I've ever used is vanilla, and just opening a jar of vanilla extract (real, please, not imitation) in another room is a great way to get me rushing in to look over your shoulder.  I think it's unfortunate that the word "vanilla" has come to mean "plain" to so many minds, because true vanilla is anything but plain.  Consider that vanilla is the seed pod of a tropical climbing orchid, and "plain" starts to go out the window.  Vanilla Sugar is not a cheap product to make and have on hand, but I think it's worth the occasional splurge because of the way it elevates sweet baked goods.

  • 2 C granulated sugar
  • 1 vanilla bean
1.   Pour sugar into a bowl and set aside.  Slice the vanilla bean down the center to open it.  Scrape the inside of the bean with the side of a small knife to remove the seeds. 
2.  Add seeds to the bowl of sugar, and use your fingers to rub the inside of the scraped bean with some of the sugar, to coax out any additional seeds that you may have missed while scraping.  Stir together seeds and sugar to get the seeds as well mixed as possible.
3.  Pour sugar and seed mixture into an airtight container, burying the bean in the sugar as well.  It will take 1-2 weeks for the flavouring to infuse fully.

Yield: 2 Cups vanilla sugar

Robyn's notes: once the vanilla sugar has combined, it can be used in place of sugar in sweet recipes, without needing to adjust measurements.  It's also good in coffee or tea, sprinkled on oatmeal or fruit, or as a simple but elegant gift-in-a-jar for friends who bake.  To make this more cost-efficient, used beans work fine, too.  If you've made a custard or sauce with a vanilla bean, you won't be eating the actual bean as part of that dish.  So once you've removed the bean from its previous use, pat it dry gently and put it into the sugar.  As the bean dries in the sugar, give the canister a shake from time to time, it'll break up any clumps that may have formed and help loosen any remaining "vanilla caviar" (the seeds) that may still be in the bean.  In the photo above, I used half of a new bean and half a bean that had already been used for another purpose.  Vanilla sugar can be stored indefinitely in an air-tight container, just as regular sugar can, and just needs to be topped off with additional sugar and more seeds or another bean as you use it up. 

***** 5 Stars: Excellent. A favourite for both of us, I will make this repeatedly

Sunday, May 20, 2012

How to Whip Cream


Take a look at the ingredients list of a package of whipped cream.  Don't have one nearby?  Here's what I found on the side of a tub of Cool Whip: water, corn syrup, hydrogenated vegetable oil, high fructose corn syrup, sodium caseinate, natural and artificial flavor, modified food starch, xanthan and guar gum, polysorbate 60, polysorbate 65, sorbitan monostearate, sodium hydroxide, beta carotene.  That's really not the slightest bit appetizing to me, and honestly I never have need of 8oz (more than 3 Cups) of whipped cream.  Interestingly, it takes less time to whip cream from scratch than it does to drive to the store and buy Cool Whip, assuming you have heavy cream in the house.
  • 1/2 C heavy cream
  • 2 tsp granulated sugar
  • 1/4 tsp vanilla
1.  About 10 minutes before you plan to start, place a whisk and a medium metal bowl in the freezer so that they'll be cold when you begin.
2.  Pour cream into bowl and begin whisking as quickly as you can keep up with.  Be sure to rotate the bowl so that you access every bit of the cream.
3.  As soon as you see the beginning of soft peaks forming (they'll look like wavy streaks), add the sugar and vanilla.  Continue whisking until soft peaks have formed, being careful not to overwhip.  The cream should hold its shape when dolloped onto something.

Yield: approx 1 Cup 

Robyn's notes: It's best to use a bowl that's somewhat deep, instead of one with a wide mouth, and keep in mind that the cream will about double in size, so pick a bowl that can accommodate that.  I can't give estimates on how long to whisk each stage because I'm relatively weak from my health problems, so the speed at which I whisk may be completely different from what someone else would do.  Just watch for the strength of the peaks and it should be fine.  This should be used right away, but if it needs to be refrigerated for a couple hours, just give it another quick whisking before using, to re-incorporate it all.  When I'm making an ingredient that calls for cream, I buy it in a one-pint carton and get a package of strawberries or raspberries or similar at the same time.  Then, when I've used as much cream as I'll need for the recipe in question, I can whip up most of the rest of the carton into whipped cream and serve it on fruit (or even as part of a quick fruit shortcake).  If you're used to Cool Whip, real whipped cream may not be sweet enough for your taste, in which case feel free to increase the amount of sugar incrementally until it's the way you like it.   

***** 5 Stars: Excellent. A favourite for both of us, I will make this repeatedly

Thursday, May 3, 2012

Red Potato Gratin Dauphinois

  • 3/4 C heavy cream
  • 1 Tbsp Dijon mustard
  • 1/2 Tbsp garlic, minced
  • salt and pepper to taste
  • 8 small to medium red potatoes
  • 1/2 Tbsp olive oil
  • 1/2 C Gruyere cheese, shredded
  • 1/2 C fontina cheese, shredded
1.  Preheat the oven to 400°F.
2.  In a large mixing bowl, whisk together the heavy cream, Dijon, and garlic; add salt and pepper. Cut the potatoes as thin as possible using either a mandoline or your sharpest knife and place them in the cream mixture to marinate.
3.  Rub the olive oil all over the sides and bottom of two gratin pans and then begin shingling the potato slices in a single layer on the bottom of the pans. When the first layer is finished, sprinkle a thin layer of both Fontina and Gruyere on top of the potatoes (it should be about 1 Tbsp of each, depending on the shape of your pan). Repeat this process until you have 3 layers of potatoes, then pour the cream mixture over the top, filling it up about halfway; make sure you reserve enough of the Gruyere to liberally coat the top layer of potatoes.
4.  Bake, uncovered, at 400°F for 30 minutes, then turn on broiler and broil for 2 more minutes.  Let cool for at least 5 minutes before serving.

Robyn's notes: this is another recipe I'm quite proud of.  It came out fabulously.  When the first 30 minutes of cook time had finished, I took the pan out of the oven, turned on the broiler, and poked through all three layers of potatoes with a toothpick, to see how tender they were.  If any part of them had been still crunchy, I would have broiled for longer than the 2 minutes, to get them nice and tender.  Fortunately all three layers were perfect, so the 2 minutes under the broiler was just right to give it an extra browning on top.  Since I'm not allowed to eat potato skins, I peeled my half of the potatoes.  I served this as a meal, but it can also be a side, though I'd recommend getting all the smallest potatoes possible if serving as a side.  

***** 5 Stars: Excellent. A favourite for both of us, I will make this repeatedly

Thursday, March 8, 2012

Gnocchi Mac n Cheese

See notes below for yield information


I came across this recipe on The Cutting Edge of Ordinary, who in turn got it from Noble Pig.

  • 1 pound purchased or homemade gnocchi
  • 2 Tbsp butter
  • 2 tsp garlic, finely chopped
  • 1 Tbsp all-purpose flour
  • 3/4 C milk
  • 1 tsp Dijon mustard
  • 1/4 C shredded Gruyere cheese
  • 1/4 C shredded fontina cheese
  • Salt and white pepper to taste
  • 1/3 C shredded Parmigiano-Reggiano
1. Preheat oven to 375. Prepare gnocchi according to package directions. Drain and place gnocchi in a single-layer in a 1-1/2 quart shallow baking dish that has been sprayed with nonstick spray.
2. Melt butter in a medium saucepan over medium heat. Stir in garlic and cook until fragrant, about 30 seconds. Whisk in flour until it thickens and bubbles, then whisk in milk and Dijon. Continue to whisk mixture and cook until slightly thickened, about 3-5 minutes.
3. Combine Gruyere and fontina, then add by the handful to milk mixture, stirring until melted before adding the next handful. Once all cheese is melted, season sauce with salt and pepper.
4. Pour sauce over gnocchi and sprinkle with Parmigiano-Reggiano over top. Bake gnocchi until they puff and the cheese is golden and bubbly, about 25 minutes. Let gnocchi rest for 5 minutes before serving.

Robyn's notes: this is fantastic, absolutely wonderful. The spots where the sauce has crisped in the oven are absolutely the best parts, and our forks fought over the last few gnocchi to get that bit of crunch. I've made the recipe twice, actually, because I had some question about the yield. The recipe calls for 1 pound of gnocchi, which is definitely more than 2 servings, but the amount of cheese in the sauce didn't seem like enough to create a sauce for 4 servings. Many of the commenters on the blog where I found this mentioned making this recipe and serving themselves, their spouse, and their children, which indicated that it served 4 people, but I still didn't trust the sauce to go that far. So I made the dish once just for me, using the full amount of sauce but half as much gnocchi. Tasted great but way too much sauce. According to the gnocchi package (I was lazy and used store-bought), 1 pound is 3 servings. When I made the full recipe, as listed above, the two of us polished it off easily and would not have left any for another person, so I'm not reducing any of the measurements. Be aware that this should probably be considered a treat or a splurge, and is more than 2 servings but less than 4.

***** 5 Stars: Excellent. A favourite for both of us, I will make this repeatedly

Tuesday, March 6, 2012

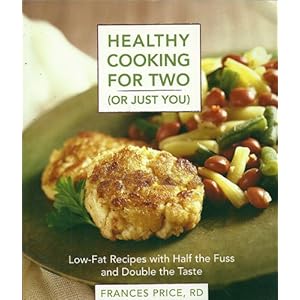
Cookbook Review: Healthy Cooking For Two (Or Just You)


Author: Frances Price, R.D.
Subtitled: Low-Fat Recipes with Half the Fuss and Double the Taste
Published: 1995 by Rodale, re-released 1997 with a different cover but same contents
Available for Purchase: Amazon, Powell's


Within the first few months of purchasing this cookbook I had made around 50% of the recipes, and have since increased that to nearly 80%. There were only two occasions where we felt that a dish shouldn't go on the 'repeat' list, which is a great record, especially as compared to the other 'cooking for two' books I have. Great results come with basic skills, and the focus is on fresh ingredients as opposed to canned or frozen.

I love that this cookbook is focused on the recipes. There are two sections in the beginning with tips and techniques, and the occasional in-depth ingredient explanation fleshing out a recipe, but there is no space that's wasted that could better be devoted to recipes.

Each entry is listed in column format, with a column for the measurements to serve 1, and a column for the measurements to serve 2. A few recipes have a column for 2 and a column for 4, but they are the exception.

I never give cookbooks as gifts, because people have such different tastes and needs when cooking, but made an exception for this one. I bought a second copy for a friend and have considered buying copies for my sister and mom. All three households have two or fewer people and the variety of recipes would allow everyone to find dishes that satisfy them.


The only photo in the book is the one on the cover, so for those who need pictures of the completed dish to guide or inspire them, that may be a problem. This is actually the cookbook that cured me of that stumbling block, and I'm a better cook for it. Basic nutritional information is included for each recipe.

Recipes I've made from this cookbook:
Hong Kong Primavera with Spicy Peanut Sauce
Baked Potato Soup with Broccoli & Cheddar
Bachelor's Prize Chicken

***** 5 Stars: Excellent. A favourite for both of us, I cook from this repeatedly

Thursday, June 16, 2011

Rigatoni and Ham Bake


  • 1 1/2 C Rigatoni or 3/4 C elbow macaroni
  • 1 C diced cooked ham
  • 3oz (3/4 C) shredded cheddar cheese, divided
  • 1 Tbsp butter
  • 2 Tbsp flour
  • 1/4 tsp salt
  • 1/8 tsp dry mustard
  • 1 1/4 C milk
  • 1/3 C crushed potato chips
1. Heat oven to 350°F. Cook pasta according to package instructions. Drain.
2. In large bowl, combine cooked pasta, ham, and 1/2 Cup cheese.
3. In medium saucepan, melt butter. Blend in flour, salt, and mustard. Add milk all at once. Cook until thickened, stirring constantly, about 1 minute. Combine sauce with pasta mixture. Turn into individual 2-cup casserole dishes. Toss remaining 1/4 Cup cheddar cheese with potato chips; sprinkle over top. Bake at 350°F for 20 to 25 minutes.


Robyn's notes: We've been making this recipe in my family since 1981. It's one of those very typical late-70s/early-80s casseroles, but we love it all the same.  My family always uses more cheese than is called for in practically any recipe, so feel free to go a little overboard on cheese.

***** 5 Stars: Excellent. A favourite for both of us, I will make this repeatedly
Friday, May 20, 2011

Chocolate Cherry Bars


Check yield, this is a full-size dessert, not scaled down for two
  • 1 pkg Pillsbury Fudge Cake Mix
  • 21-oz can cherry fruit filling (pie filling)
  • 1 tsp almond extract
  • 2 eggs, beaten
Frosting:
  • 1 C sugar
  • 5 Tbsp butter
  • 1/3 C milk
  • 6-oz pkg (1 cup) semi-sweet chocolate morsels
1. Preheat oven to 350°F. Using solid shortening or margarine (not oil), grease and flour 13x9inch pan.
2. In large bowl, combine first four ingredients. By hand, stir until well mixed. Pour into prepared pan. Bake 25-30 minutes or until toothpick inserted in center comes out clean.
3. While bars cool, prepare frosting. In small saucepan, combine sugar, butter, and milk. Boil, stirring constantly, 1 minute. Remove from heat; stir in chocolate pieces until smooth. Pour over partially cooled bars.

Yield: About 3 dozen bars.

Robyn's notes: this has been a family favourite for decades, because it's so easy but comes out so good every time. It's moist and the cherry isn't overpowering. This was a Pillsbury Bake-off recipe winner in 1974, and Pillsbury does sometimes change the name of their boxed mixes. I don't know if they currently use the words "fudge cake mix", but any basic chocolate cake mix works. Just be sure it's a cake mix, not brownies, and that there isn't anything additional (such as chunks of chocolate). When making this last night, we had a Betty Crocker Dark Chocolate Cake Mix in the house, and that's what we used.

***** 5 Stars: Excellent. A favourite for both of us, I will make this repeatedly