Showing posts with label breads. Show all posts

Friday, March 4, 2022

Pice ar Maen


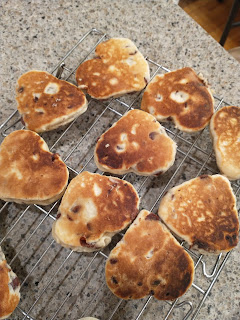
I had been wanting to make Welsh cakes for awhile, but basically just not getting around to it, because I knew they were traditionally made on a griddle, which I don't have.  One day I just decided to do it in my enamel cast iron skillet and they came out marvelously!

  •  1 1/2 C flour
  • 1/2 C sugar
  • 1 tsp baking powder
  • 1/4 rounded tsp salt
  • 1/4 tsp nutmeg
  • 8 Tbsp butter, cold, diced
  • 1/2 C milk chocolate chips
  • 1 egg, beaten with enough milk to yield 1/3 C liquid

1.  In a medium bowl, whisk together flour, sugar, baking powder, salt, and nutmeg.
2.  Work in the butter until mixture is evenly crumbly, a few larger pieces of butter can remain.  
3.  Mix in the chocolate chips.
4.  Add the milk/egg mixture, stirring until everything is moistened.
5.  Turn the sticky dough out onto a well-floured surface and shape into a disc.  Roll into a circle about 1/4 inch thick.  Be sure to reapply flour under the dough while rolling, so that it won't stick.  Cut dough into circles using 3 inch biscuit or other round cutter.  Gather and re-roll scraps, cutting until all dough is used.
6.  Heat an ungreased skillet over low-medium heat (for an electric skillet, set to 325°F).  Dry-fry the cakes (no grease) for about 2 1/2 minutes on each side, until golden brown and cooked through.  Let cool on a rack.

Robyn's notes: I don't even want to say how quickly I ate the first batch of these.  I didn't expect the dough to be as sticky as it was; simply cutting them out was a bit of a challenge.  Tradition would call for currants, not chocolate, but I went for my preference.  They certainly do make them with chocolate in Wales sometimes.  Do a test cake to see if the pan is the right heat.

**** 4 Stars: Very Good. Enjoyed by us both, I will make this frequently

Wednesday, May 20, 2020

Sourdough Discard Biscuits


  • 1/2 cup All-Purpose Flour
  • 1 teaspoon baking powder
  • 1/4 rounded teaspoon salt
  • 4 tablespoons unsalted butter, cold
  • 1/2 cup sourdough starter discard
1.  Preheat the oven to 425°F, with a rack in the upper third. Grease a baking sheet, or line it with parchment.
2.  Combine the flour, baking powder, and salt. Work the butter into the flour until the mixture is unevenly crumbly.  Add the starter, mixing gently until the dough is cohesive.
3.  Turn the dough out onto a lightly floured surface, and gently pat it into a round about 1"-thick.  Use a sharp biscuit cutter to cut four rounds, cutting them as close to one another as possible. Or slice with dough cutter into four irregularly shaped biscuits.
4.  Place the biscuits onto the prepared baking sheet, leaving about 2" between them; they'll spread as they bake. Bake the biscuits in the upper third of your oven for 20 to 23 minutes, until they're golden brown.
5. Remove the biscuits from the oven, and serve warm. Or cool completely, wrap in plastic, and store at room temperature for several days. Freeze, well-wrapped, for longer storage.

Robyn's notes: even though I use the tiny starter method, I still get a lot of discard, so I was making these biscuits often for awhile.  Sourdough starters can vary in how liquid they are. If the dough seems very dry, dribble in a bit of milk or buttermilk until it comes together.  These come together easily and are quite good, especially with butter and honey.

**** 4 Stars: Very Good. Enjoyed by us both, I will make this frequently

Wednesday, June 28, 2017

Make-Ahead Pizza Dough & Frozen Pizzas

With these in the freezer, you'll never be at a loss for a meal when you're in a rush!
  • 1 packet (0.25oz or 2 1/4 tsp) yeast
  • 1 1/2 C warm water, divided
  • 3 Tbsp olive oil
  • 2 3/4 C flour
  • 1 1/4 C whole wheat flour
  • 1 1/2 tsp salt
1.  In a small bowl, stir the yeast into 1/2 C of the warm water.  Let sit for 5 minutes until dissolved.
2.  Combine the remaining 1 C warm water with olive oil.  Set aside.
3.  Combine the flours and salt in the bowl of stand mixer with dough hook attached, and mix to combine.  With the mixer running, add the yeast mixture and water-olive oil mixture to the flour.  Mix until a ball forms, stopping to scrape down sides of bowl if needed.  Mix for another minute to knead.
4.   Transfer dough to a lightly floured surface and knead by hand until dough is satiny and smooth, dusting with more flour if needed, for about 3 minutes.
5.  Place dough in an oiled container or bowl, cover, and let rise in a warm place until doubled, about 1 hour.
6.  Turn dough out onto floured surface and divide into 5 equal pieces.  Round the dough into tight balls, cover with a clean towel, and let sit for 20-30 minutes.
7.  The dough can be baked now, or may be wrapped tightly and stored in the refrigerator for 8 hours or the freezer for about 2 months.  To thaw frozen dough, move to refrigerator still wrapped, for 8 hours.
8.  To make frozen pizza, preheat oven to 500°F.  Press dough into 8-inch cast iron skillet.  Add preferred toppings and bake pizza until the crust is set but not browned, 5-6 minutes.  Let pizza cool to room temperature, wrap well, and freeze.  Bake directly from the freezer for about 12 minutes.

Robyn's notes: this is quite easy and makes a good pizza dough with the right texture and bite.  Use it to make Cast Iron Pizza.  Watch me demonstrate this recipe on youtube!

*** 3 Stars: Good. At least one of us liked this enough for me to make it again, but not often

Thursday, May 11, 2017

Bacon Cheddar Bread

  • 3 slices bacon
  • 3/4 C plus 2 Tbsp unbleached all-purpose flour
  • 1 tsp baking powder
  • 1/4 tsp salt
  • pinch cayenne pepper
  • pinch pepper
  • 2oz extra-sharp cheddar cheese, cut into 1/4-inch cubes (about 1/2 C)
  • 1/4 C whole milk
  • 3 Tbsp sour cream
  • 1 Tbsp unsalted butter, melted and cooled, plus extra for greasing pan
  • 1 large egg
  • 1oz Parmesan cheese, shredded on large holes of box grater (about 1/3 C)
1.  In a cast iron skillet, cook bacon well.  Crumble and spread out to cool on paper towels.  Drain off excess bacon grease but do not wipe out or clean skillet.
2.  When bacon is completely cool and all grease is gone from it, preheat oven to 350°F.
3. Whisk flour, baking powder, salt, cayenne, and pepper together in medium bowl. Fold in cheddar, breaking up clumps, until it is coated with flour mixture. In separate bowl, whisk milk, sour cream, melted butter, and egg together until smooth. Gently fold milk mixture into flour mixture with rubber spatula until just combined (do not overmix). Batter will be heavy and thick.
4. Scrape batter into skillet and smooth top. Sprinkle remaining 3 Tbsp Parmesan cheese evenly over top of batter. Bake until golden brown and toothpick inserted into center comes out with few crumbs attached, 25-30 minutes.
5. Let bread cool in pan for 5 minutes, then turn it out onto wire rack and let cool completely before serving.

Robyn's notes: I had originally envisioned these as biscuits, but the batter was quite loose and ran together in the oven.  I cut the finished bread into four quarters along the lines where the biscuits had been dropped in.  Really good.  Watch me demonstrate this recipe on youtube!

**** 4 Stars: Very Good. Enjoyed by us both, I will make this frequently

Saturday, May 6, 2017

Cherry Garcia Bread


I made ice cream bread a few years ago, when it was making its way across the web like lightning.  It was fine, it definitely was bread, but it just wasn't very interesting.  My very first thought at the time was that it needed dark cherries.  So when I noticed that Ben & Jerry's pints were on sale recently, I decided that Cherry Garcia® would make a good experiment. 
  • 1 C Cherry Garcia® ice cream, softened
  • 3/4 C self-rising flour (see notes, below)
1.  Preheat oven to 350ºF.  Grease and flour a mini loaf pan.  
2.  Stir together ice cream and flour until flour is just moistened.  Do not overmix.  Spoon into prepared loaf pan.  
3.  Bake for 25-30 minutes or until a toothpick inserted near the center comes out clean.  Cool in pan for several minutes before transferring to a wire rack.

Robyn's notes: if you don't have self-rising flour on hand and don't want to buy it just for this purpose, you can make your own.  Self-rising just means the leavening is already mixed into the flour.  To make, combine 1 C all-purpose flour, 1 1/2 tsp baking powder and 1/4 tsp salt, then measure what the recipe calls for from the mixture.  I bake at high altitude, so this took more than 35 minutes to get properly done in the center, but closer to sea level the shorter time may work best.

*** 3 Stars: Good. At least one of us liked this enough for me to make it again, but not often
 

Thursday, December 22, 2016

Pâte Brisée

This pie dough can be used for savory or sweet pies, and once prepared can be kept in the refrigerator for 5 days or the freezer for up to 3 months. 
  • 1/2 C flour
  • 2 Tbsp cold butter
  • 1 Tbsp cold shortening
  • 1/4 tsp salt
  • 2 Tbsp ice cold water, as needed
1.  Place flour, butter, shortening, and salt in a bowl.  Cut the butter and shortening into the flour until it is the size of peas.  Add 4 tsp of water and stir lightly with a fork until it just starts to form moist clumps, adding a bit more water, if necessary.
2.  Divide the dough into two flattened discs and wrap them individually with cling film.  Chill the dough at least 30 minutes before rolling as directed in recipe.

Robyn's notes: this dough worked quite well for me, and I enjoyed the flake and flavour of it.  If it's been frozen, thaw by leaving it in the fridge overnight first.  The recipe makes enough dough for a top and bottom crust for one small pie.

*** 3 Stars: Good. At least one of us liked this enough for me to make it again, but not often

Saturday, September 17, 2016

S'mores Bread

As the warm summer days give way to chill autumn nights, this is a great bread for holding onto those campfire moments just a little longer.
  • 3 Tbsp butter, softened
  • 1/4 C brown sugar
  • 4 tsp sugar
  • 1 egg
  • 1/3 C sour cream
  • 2/3 C flour
  • 1/2 C graham cracker crumbs
  • 1/4 tsp salt
  • 1/4 tsp baking powder
  • 1/4 tsp cinnamon
  • 1/8 tsp baking soda
  • 3 Tbsp milk
  • 1/3 C milk chocolate chips
  • 6 Tbsp marshmallow creme
1.   Preheat oven to 400°F.  In a small mixing bowl, cream butter and sugars.  Add egg; beat well.  Stir in sour cream.  Combine the flour, graham cracker crumbs, salt, baking powder, cinnamon, and baking soda; add to creamed mixture alternately with milk just until moistened.  Fold in chocolate chips.  Add marshmallow creme to mixture, and swirl through gently without combining (the marshmallow creme should remain visible).
2.  Grease a mini loaf pan.  Fill two-thirds full with batter.  Bake at 400°F for 35-40 minutes, or until a toothpick comes out clean.  Cool for 5 minutes before removing from pan to a wire rack.  Serve warm. 

 Robyn's notes: I had some difficulties with the marshmallow creme, because it expands as it bakes, which caused some overflow.  If the creme is stirred into the batter too much, it will disappear in the finished bread, which will still taste good but won't taste like a S'more.  If the marshmallow overflows there won't be enough remaining in the bread for that flavor.  So it's a balancing act.  It can be hard to test for doneness, as a toothpick has to be inserted where there are no chocolate chips or marshmallow ribbons to get an accurate read, it may be necessary to poke in several places.  Watch me demonstrate this recipe on YouTube!

*** 3 Stars: Good. At least one of us liked this enough for me to make it again, but not often

Thursday, June 9, 2016

Old-Fashioned Baking Powder Biscuits


My favourite biscuits of all time, my mom has been making these as long as I can remember.  When I struck out on my own for the first time she made me a recipe binder with some well-loved dishes, several of which she reduced to serve fewer people.  The original recipe made 8-9 biscuits, my mom did the work of cutting it down to this form.
  • 1 C flour
  • 1 1/2 tsp baking powder
  • 1/4 tsp salt
  • 1/4 C shortening
  • 1/3 - 1/2 C milk
1.  Preheat oven to 450°F.
2.  In a medium bowl, combine flour, baking powder, and salt.
3.  Using a fork or two table knives, or a pastry blender, cut shortening into flour mix until consistency of coarse meal.
4.  Add milk beginning with smaller amount; stir with fork until mixture leaves sides of bowl and forms a soft, moist dough, adding additional milk one Tablespoon at a time, if necessary to achieve desired consistency.
5.  On floured surface, toss lightly until no longer sticky.  Roll out to 1/2 to 1 inch thick; cut with 2 inch floured cutter or cut into squares with serrated knife or dough blade.
6.  Place on ungreased baking sheet.  Bake at 450°F for 8 to 12 minutes or until light golden brown.  Serve hot.  Yield: 4 biscuits

Robyn's notes: to make these into buttermilk biscuits, add 1/8 tsp baking soda to flour mix and substitute buttermilk for milk.  For cheese biscuits, add 2oz shredded Cheddar cheese to flour-shortening mixture.  Bake on greased baking sheet.  These are a big hit around here, and we will both eat basically as many as are available, so it's good to limit it to making fewer.  You can watch me prepare these biscuits on youtube!  

***** 5 Stars: Excellent. A favourite for both of us, I will make this repeatedly
 

Sunday, February 14, 2016

Soft Pretzels


I made these for a care package for my sweetheart for Valentine's Day.  He's still trying to avoid sugar as much as possible, which means no red cupcakes or pink cookies or similar, and I despaired at finding something visually related to the holiday until the light dawned: heart-shaped pretzels!  The recipe would make 4 pretzels, I used it to make 2 plus a bunch of pretzel bites. 
  • 3/4 C warm water, 110-115°F
  • 1/2 Tbsp sugar
  • 1 tsp kosher salt
  • 1/2 envelope active dry yeast (1 1/8 tsp) (not rapid rise)
  • 11 oz all-purpose flour
  • 1 oz unsalted butter, melted
  • Vegetable oil
  • 1/3 C baking soda
  • 2 C cold water
  • pretzel salt (or kosher salt)
1.  Heat oven to 350°F.  Combine the warm water, sugar and salt in the bowl of a stand mixer and sprinkle the yeast on top. Set aside for 5 minutes, or until the mixture foams.
2.  Add flour and butter and, using dough hook attachment, mix on low speed until well combined. Change to medium speed and knead until the dough is smooth and pulls away from the side of the bowl, 3 to 4 minutes.
3. Remove dough from the bowl, clean the bowl, then oil it well. Return the dough to the bowl, cover with plastic wrap, and set aside in a warm place for 50 to 55 minutes, or until the dough has doubled in size.  At the same time, spread baking soda on a baking pan and bake at 350°F while dough is rising - about 55 minutes.  Be very careful when removing pan from oven!  Do not breathe in the soda dust!
4. Turn oven heat up to 375°F. Line sheet pan with parchment paper and lightly brush with oil. Set aside.
5. Add baked soda to cold water, stir to dissolve. Turn dough out onto a lightly oiled work surface and divide into 4 equal pieces. Roll out each piece of dough into a 24-inch rope. Make a U-shape with the rope, and, holding the ends of the rope, cross them over each other and press onto the bottom of the U in order to form the shape of a pretzel. Place into cold water solution and allow to soak for 3-4 minutes. Repeat with the remaining pieces of dough.
6. Remove pretzels from water using a large flat spatula or spider. Place onto lined pan and sprinkle with salt.  Allow to air-dry for 15 minutes.  Move to a fresh section of the pan and bake at 375°F for 20-25 minutes, watching for appropriate browning. Cool on a rack for 5 minutes before serving.

Robyn's notes: this is multiple recipes from other sources combined and reduced.  I can't eat anything that requires chewing at the moment (just had surgery), so no star rating or opinion on finished product until he gives me his feedback.  This was actually a very easy baked good to make, even though there are so many steps.  For the pretzel bites, I let them air-dry for about 10 minutes instead of 15, and baked for about 10 minutes instead of 20.  Each was about an inch of dough prior to baking.

Thursday, November 8, 2012

Banana Bread Mini Loaf

Since the checker at the market chose to put my canned goods in the bag on top of my bananas, some had to be sacrificed to bread.  This was meant to also have a chocolate glaze, but the unsweetened chocolate that was in my grocery basket was never rung up by the checker.  No way was I driving all the way back to town when I got home and discovered I didn't have it (since I also was not charged for it), so I decided to just make the bread without the glaze, which is of course also perfectly good.
  • 1 1/4 C all-purpose flour
  • 1/2 tsp baking powder
  • 1/4 tsp baking soda
  • 1/3 C sugar
  • 1 egg
  • 1 Tbsp butter, softened
  • 1/2 C mashed ripe banana 
  • 2 Tbsp plain yogurt
  • 1/4 C chopped pecans or walnuts (optional)
1.  Preheat oven to 350°F.  Grease and flour a mini loaf pan (5 1/2 " x 3") .
2.  In a medium mixing bowl, sift together flour, baking powder, and baking soda.
3.  In another medium bowl, beat sugar, eggs, and butter until fluffy.  Slowly beat in bananas and yogurt.  Add flour mixture and mix just until blended.  Do not overmix or the bread will be tough.  Stir in nuts if using.
4.  Pour batter into prepared pan and bake on middle shelf for 35-40 minutes or until a toothpick inserted in the center comes out clean.  Cool in pan on a wire rack for 5 minutes, then remove from pan to finish cooling on wire rack.  Wrap tightly in plastic wrap and let stand overnight to allow flavours to mellow.

Robyn's notes: I did not use the nuts, because I'm not able to eat them.  For me, the amount of banana needed was one-and-a-half medium bananas once the completely black bruised sections had been cut out.  This probably translates to one large banana that hasn't been manhandled by a checker who was presumably having a lousy day.  My baking time was 40 minutes.  I made this bread again after we moved, so I can confirm it was as good without any needed changes at 4,500ft.

*** 3 Stars: Good. At least one of us liked this enough for me to make it again, but not often

Monday, October 22, 2012

Peanut Butter Bread Mini Loaf

This is a very simple recipe that produces a bread that's good for snacks or pbj sandwiches.  I've eaten it toasted or not, spread with jelly or honey.  While it's baking the whole house gets a nice smell of peanut butter, but the flavour of the finished loaf is pretty subtle.
  • 1 C flour
  • 2 rounded Tbsp sugar
  • 1 tsp baking powder
  • 1/2 tsp salt
  • 1 1/2 Tbsp beaten egg
  • 1/2 C milk
  • 1/4 C + 2 Tbsp peanut butter
1.  Preheat oven to 350°F.  In medium bowl, combine flour, sugar, baking powder and salt. Add egg, milk and peanut butter; stir just until combined. Pour into greased mini loaf pan (5 1/2 by 3 inches).
2.  Bake for 40-50 minutes, until toothpick inserted near center comes out clean.  Allow to cool 10 minutes in the pan, then remove to a wire rack to finish cooling.  

Robyn's notes: I own steel mini loaf pans, but for households that don't, disposable ones can generally be found in the kitchen supplies aisle of grocery stores (I always keep a few of those on hand for cooking gluten-free breads, so there's no danger of cross-contamination from my regular pans).  As I've said before, I suspect that my oven thermostat is off, so while this took 40 minutes to bake for me, it may take longer for more accurate ovens.  This makes a fairly dense bread, but I still think it has good texture.  It would get a higher star rating if there was more peanut butter flavour, it's just a bit too mild for my taste and adding much more peanut butter would keep it from baking properly.  Chunky peanut butter is an option for those who can have it, I'm not supposed to.

Monday, October 15, 2012

Drop Biscuits

Growing up, my mom had an old recipe for baking powder biscuits that we all loved.  Soft and fluffy and flaky, perfect with jam or honey or even just butter.  I've made the recipe myself a few times, but don't have the recipe available just now. These drop biscuits aren't a replacement for the old cut-out biscuits I love, but they're an easy substitution, especially for a leisurely morning.
  • 2/3 C flour
  • 3/4 tsp baking powder
  • 1/4 tsp baking soda
  • 1/8 tsp sugar
  • 1/8 tsp salt
  • 1/3 C buttermilk, cold
  • 2 Tbsp butter, melted and slightly cooled, plus 1 tsp extra for brushing the completed tops
1.  Preheat oven to 450°F.  Line baking sheet with parchment paper.
2.  In medium bowl, whisk together flour, baking powder, baking soda, sugar, and salt.  In a small bowl, combine chilled buttermilk and melted butter until butter forms small clumps.  Stir buttermilk mixture into flour mixture with a rubber spatula until just combined and dough is pulling away from the sides of the bowl.
3.  Using a greased 1/4 C measure or #16 scoop, drop four mounds of dough onto prepared baking sheet (see notes, below), about 1 1/2 inches apart.  Bake 12-15 minutes until tops are golden brown and crisp, turning pan halfway through baking.
4.  Brush additional melted butter on tops of baked biscuits, transfer to a wire rack, and allow to cool for 5 minutes, serving warm.

Robyn's notes: I used a 1/4 C measure to scoop the dough onto the baking sheet, and got exactly three biscuits.  The original recipe gives a yield of four, so it's up to you whether to scoop the dough into four equal portions or measure out in 1/4 C amounts as instructed.  Be aware that smaller biscuits will cook faster.  These came out slightly dry for my taste, but I strongly suspect that my oven thermostat is wrong and that they were baking at a temperature higher than the oven claimed.  Since I haven't found my oven thermometer in any of the boxes we have here, I can't check it yet.  The biscuits were still good, easy to pull apart and tasty both with jam and just with dabs of butter.  

**** 4 Stars: Very Good. Enjoyed by us both, I will make this frequently

Monday, April 30, 2012

Easy Berry Yogurt Muffins

Note: check yield before starting, this is a full-size recipe, makes 12 muffins
  • 1 1/2 C flour 
  • 1 tsp baking powder 
  • 1/2 tsp salt 
  • 1/2 C packed brown sugar 
  • 4 Tbsp melted butter 
  • 1 large egg 
  • 3/4 C plain yogurt 
  • 2 Tbsp milk 
  • 1 tsp vanilla 
  • 1 C blackberries, frozen or fresh
1.  Preheat oven to 400°F.  Line muffin tin with 12 paper cups.
2.  In a large bowl, mix together the flour, baking powder, salt, and brown sugar.  In another bowl, combine the melted butter, egg, yogurt, milk, and vanilla until well mixed.  Pour the wet ingredients into the dry and gently stir.  Add in the blackberries and stir until just combined.
3.  Spoon batter into paper cups and bake for about 20 minutes or until the tops are golden.  Allow to cool for 5-10 minutes, serving while still warm.

Yield: 12 muffins

Robyn's notes: I may eventually cut this recipe down, but sometimes you just have to make it once at full-size in order to determine the best method for halving the single egg.  These muffins definitely need the paper linings for the tin, they wouldn't have come out of a tin that's just been sprayed or greased.  When combining the wet ingredients, I melted the butter in the microwave, let it sit to cool while I combined the rest of the wet ingredients, then slowly drizzled in the butter while stirring.  If you add melted butter to cold egg, the egg will start to cook in the bowl.  For me, the 20 minute cook time was perfect, it definitely could not have come out any sooner and shouldn't go much longer, but some ovens might need one or two minutes more.  I used fresh berries.  The berries, by the way, are somewhat molten when the muffins first come out of the oven, so be careful.  Would make a good brunch muffin.  

**** 4 Stars: Very Good. Enjoyed by us both, I will make this frequently
 

Friday, July 15, 2011

Cheddar Cheese Bread


  • 1oz Parmesan cheese, shredded on large holes of box grater (about 1/3 C; see note)
  • 3/4 C plus 2 Tbsp unbleached all-purpose flour
  • 1 tsp baking powder
  • 1/4 tsp salt
  • pinch cayenne pepper
  • pinch pepper
  • 2oz extra-sharp cheddar cheese, cut into 1/4-inch cubes (about 1/2 C)
  • 1/4 C whole milk
  • 3 Tbsp sour cream
  • 1 Tbsp unsalted butter, melted and cooled, plus extra for greasing pan
  • 1 large egg
1. Preheat oven to 350°F. Grease 5-1/2 by 3 inch loaf pan, then sprinkle 2 Tbsp plus 1 tsp Parmesan cheese evenly over bottom of pan.
2. Whisk flour, baking powder, salt, cayenne, and pepper together in medium bowl. Fold in cheddar, breaking up clumps, until it is coated with flour mixture. In separate bowl, whisk milk, sour cream, melted butter, and egg together until smooth. Gently fold milk mixture into flour mixture with rubber spatula until just combined (do not overmix). Batter will be heavy and thick.
3. Scrape batter into prepared pan and smooth top. Sprinkle remaining 3 Tbsp Parmesan cheese evenly over top of batter. Bake until golden brown and toothpick inserted into center comes out with few crumbs attached, 30 to 40 minutes, rotating pan halfway through baking.
4. Let bread cool in pan for 5 minutes, then turn it out onto wire rack and let cool for 1 hour before serving.

Robyn's notes: this is an America's Test Kitchen recipe, which means it's very specific and has several notes. These are theirs: Shredding the Parmesan on the large holes of a box grater and sprinkling it over the top of this bread adds a nice texture and helps prevent the cheese from burning; do not grate it fine or use pre-grated Parmesan. The texture of the bread improves as it cools, so resist the urge to slice the loaf while it is piping hot. The bread can be wrapped tightly in plastic wrap and stored at room temperature for up to 3 days. These notes are mine: I did grate the Parmesan myself, and I measured both cheeses by weight, not cup measurement. Cutting the cheddar into quarter-inch cubes probably took me about as long as the rest of the preparation. The first loaf I made was cooked through (clean toothpick) after 30 minutes, but the top wasn't at all golden. I took it out and let it cool anyway, so that the inside wouldn't get too dry. It was tasty and moist but a bit dense. I'm making two more mini-loaves as gifts, so I will likely let them cook a bit longer to see how they do. The Parmesan top and bottom was a great touch.

**** 4 Stars: Very Good. Enjoyed by us both, I will make this frequently

Monday, April 14, 2008

Mini White Breads

Note: Total time approximately 2 3/4 hours
  • 1 package (1/4oz) active dry yeast
  • 1 Tbsp sugar
  • 1/3 C warm water (110F to 115F)
  • 2 1/4 to 2 1/2 C all-purpose flour (divided)
  • 1 tsp salt
  • 1/2 C milk
  • 2 tsp butter or margarine, melted
  • additional melted butter or margarine
1. Combine yeast, sugar and water in a large mixing bowl. Add 1 1/2 C flour, salt, milk, and butter.
2. Mix for 3 minutes on medium speed. Add enough remaining flour to form a soft dough. Turn onto a floured surface; knead until smooth and elastic, about 6-8 minutes.
3. Place in a greased bowl, turning once to grease top. Cover and let rise in a warm place until doubled, about 45 minutes. Punch dough down. Divide in half; shape into two loaves and place in greased 5 3/4inch x 3inch x 2inch pans.
4. Cover and let rise until doubled, about 30 minutes. Bake at 375F for 30 minutes or until golden brown. Remove from pans; cool on wire racks. Brush tops with melted butter.

Robyn's notes: mini loaf pans can be found in the utensil aisle of the grocery store if needed. I have never actually checked the temperature of the warm water, just keeping it warm but not hot. I've made these mini loaves several times over the past 8 years and they're very simple to make. Using these loaves makes for cute mini sandwiches or mini toasts, which may seem less than useful but they're great for smaller households because having two mini sandwiches is similar to having one regular sized sandwich, and then the loaves don't last so long that they get stale.

Nutritional Analysis: One 1/2 inch slice (prepared with margarine) equals 75 calories, 156mg sodium, 0 cholesterol, 14gm carbohydrate, 2gm protein, 1gm fat.
Diabetic Exchange: 1 starch